This documentation article has now been archived and replaced with the newer Patterns chapter of the Theme Handbook. Please refer to that page for the most up-to-date information on patterns.
Block patterns are one of the most powerful features at a theme author’s disposal. Introduced in WordPress 5.4, patterns made it easier for users to insert more complex layouts from the block editor while opening a world of possibilities to designers.
What are block patterns?
Essentially, a block pattern is nothing more than one or more blocks that have been pre-configured and presented to the end-user. Think of them as reusable groups of blocks.
They are ideal as starting points for users to insert into their post and page content, but they are also useful when used inside of templates.
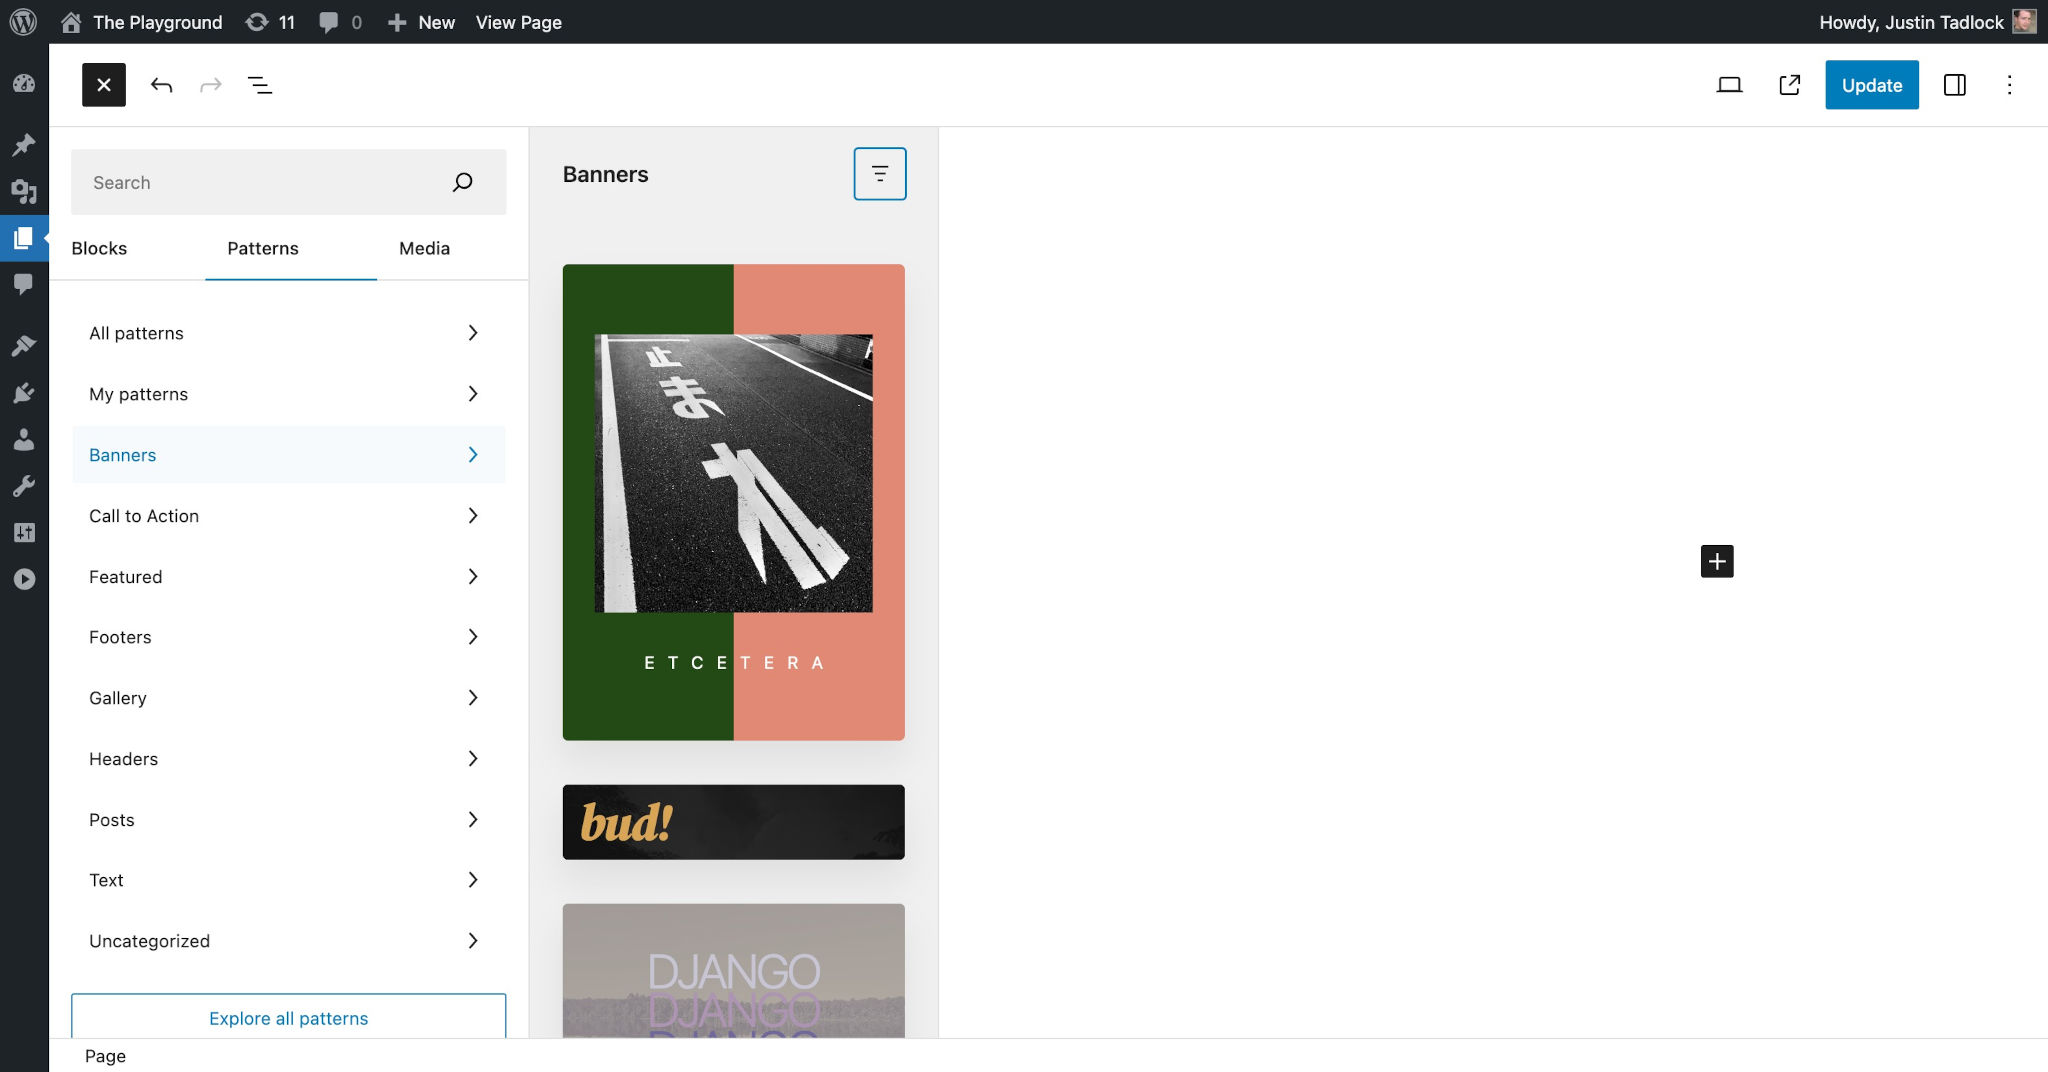
Users can insert them directly into a template from the Site Editor or into their content from the Post Editor:
In comparison to template parts, which is a similar feature for reusable groups of blocks, patterns also give you access to PHP. This means that you can internationalize text within them, dynamically add URLs to include images, and more.
Note that users can also create and manage custom patterns from the Appearance > Editor > Patterns screen in the admin. You can also use this screen to manage your own patterns in your development install:

Working with block patterns
In this section, you will learn how to create custom block patterns, register them in your theme, and unregister them. You will also learn some useful tips, tricks, and other methods for working with patterns.
Creating block patterns
The easiest way to learn to create block patterns is to start by putting a few blocks together in the Post Editor. This can be anything you like, but for the purposes of this article, the code shared below will be of a core Cover block with some blocks nested within it, following this structure:
- Group
- Heading
- Paragraph
- Buttons
- Button
Try recreating this yourself, especially if you are just getting used to working with the block editor. You can also customize this however you like, but it’s recommended to keep this relatively simple for your first time creating a pattern.
Once you’re finished, click the ⋮ (Options) icon in the toolbar and click Copy:
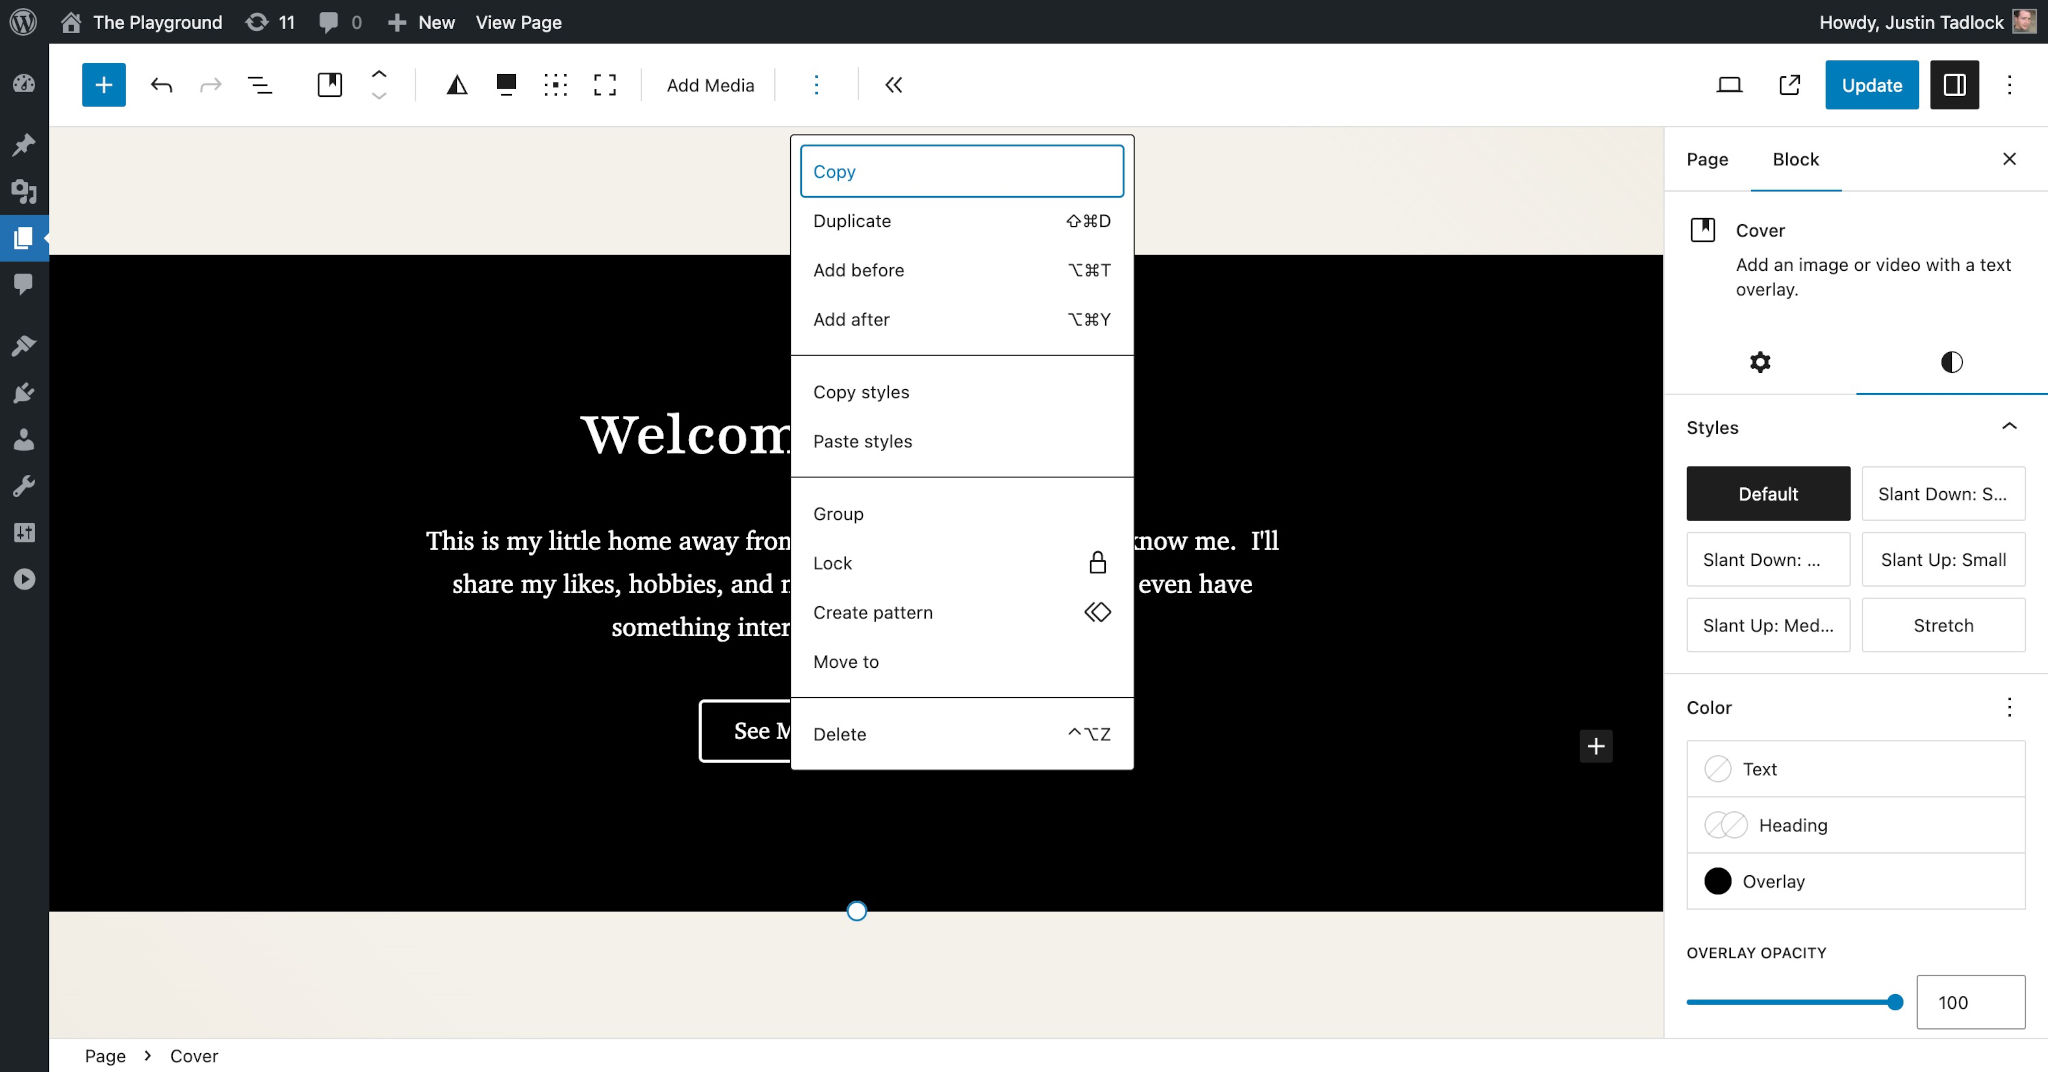
This will give you the code you need to work with, which should be similar to this:
<!-- wp:cover {"overlayColor":"contrast","align":"full"} -->
<div class="wp-block-cover alignfull"><span aria-hidden="true" class="wp-block-cover__background has-contrast-background-color has-background-dim-100 has-background-dim"></span><div class="wp-block-cover__inner-container"><!-- wp:group {"style":{"spacing":{"blockGap":"2.5rem"}},"layout":{"type":"constrained","wideSize":"%","contentSize":"75%"}} -->
<div class="wp-block-group"><!-- wp:heading {"textAlign":"center"} -->
<h2 class="wp-block-heading has-text-align-center">Welcome to My Site</h2>
<!-- /wp:heading -->
<!-- wp:paragraph {"align":"center"} -->
<p class="has-text-align-center">This is my little home away from home. Here, you will get to know me. I'll share my likes, hobbies, and more. Every now and then, I'll even have something interesting to say in a blog post.</p>
<!-- /wp:paragraph -->
<!-- wp:buttons {"layout":{"type":"flex","justifyContent":"center"}} -->
<div class="wp-block-buttons"><!-- wp:button {"className":"is-style-outline"} -->
<div class="wp-block-button is-style-outline"><a class="wp-block-button__link wp-element-button">See My Popular Posts </a></div>
<!-- /wp:button --></div>
<!-- /wp:buttons --></div>
<!-- /wp:group --></div></div>
<!-- /wp:cover -->For the remainder of this article, you will work with this same pattern, learning how to register it, unregister it, and customize it further.
It’s good practice to wrap most patterns in a Group, Cover, or other container block (i.e., a block that allows nested blocks). This makes it easier for your theme users to move the entire pattern around in the editor. You can also add a CSS class to this outer block for any custom styling that applies to the entire pattern.
Registering block patterns
There are two methods for registering block patterns in WordPress:
- By placing files with block markup in them into the
/patternsfolder in your theme. - By manually calling the
register_block_pattern()function.
The most straightforward route is the first. You’ll learn how to do both in the next sections, but this handbook will recommend using the /patterns folder except for in some edge cases.
Using the /patterns directory to register patterns
WordPress will recognize any pattern file placed in your theme’s /patterns folder, and it will automatically register it for you, provided that it has a valid pattern file header.
A file header is PHP-commented code with a list of key + value pairs at the top of a file. WordPress parses this information to gather metadata. In this case, the metadata is used to register a block pattern.
For pattern file headers, these are the keys that you can set:
Title: A human-readable title that can be translated.Slug: A namespaced slug that is unique to your pattern in the form ofnamespace/pattern-name.Categories: A comma-separated list of categories in which the pattern belongs.Description: The long description of the registered pattern. Only shown to screen readers.Viewport Width: The width of the<iframe>viewport when previewing the pattern (in pixels).Inserter: Whether to show the pattern in the inserter. Defaults totrue.Keywords: A comma-separated list of keywords related to the pattern for search.Block Types: A comma-separated list of block types to associate the pattern with.Post Types: A comma-separated list of post types in which to limit the pattern. Defaults to all post types.Template Types: A comma-separated list of template types the pattern fits with.
For most patterns, you should at least add the Title, Slug, and Categories fields. Pattern files should look like this:
<?php
/**
 * Title: Hero
 * Slug: themeslug/hero
 * Categories: featured
 */
?>
<!-- Pattern code goes here. -->
Now let’s add the code that you copied from the previous section into the /patterns/hero.php file in your theme:
<?php
/**
* Title: Hero
* Slug: themeslug/hero
* Categories: featured
*/
?>
<!-- wp:cover {"overlayColor":"contrast","align":"full"} -->
<div class="wp-block-cover alignfull"><span aria-hidden="true" class="wp-block-cover__background has-contrast-background-color has-background-dim-100 has-background-dim"></span><div class="wp-block-cover__inner-container"><!-- wp:group {"style":{"spacing":{"blockGap":"2.5rem"}},"layout":{"type":"constrained","wideSize":"%","contentSize":"75%"}} -->
<div class="wp-block-group"><!-- wp:heading {"textAlign":"center"} -->
<h2 class="wp-block-heading has-text-align-center">Welcome to My Site</h2>
<!-- /wp:heading -->
<!-- wp:paragraph {"align":"center"} -->
<p class="has-text-align-center">This is my little home away from home. Here, you will get to know me. I'll share my likes, hobbies, and more. Every now and then, I'll even have something interesting to say in a blog post.</p>
<!-- /wp:paragraph -->
<!-- wp:buttons {"layout":{"type":"flex","justifyContent":"center"}} -->
<div class="wp-block-buttons"><!-- wp:button {"className":"is-style-outline"} -->
<div class="wp-block-button is-style-outline"><a class="wp-block-button__link wp-element-button">See My Popular Posts </a></div>
<!-- /wp:button --></div>
<!-- /wp:buttons --></div>
<!-- /wp:group --></div></div>
<!-- /wp:cover -->Now if you add or edit a new post in WordPress, you should see your pattern listed in the inserter. Click the Patterns tab and select Featured:
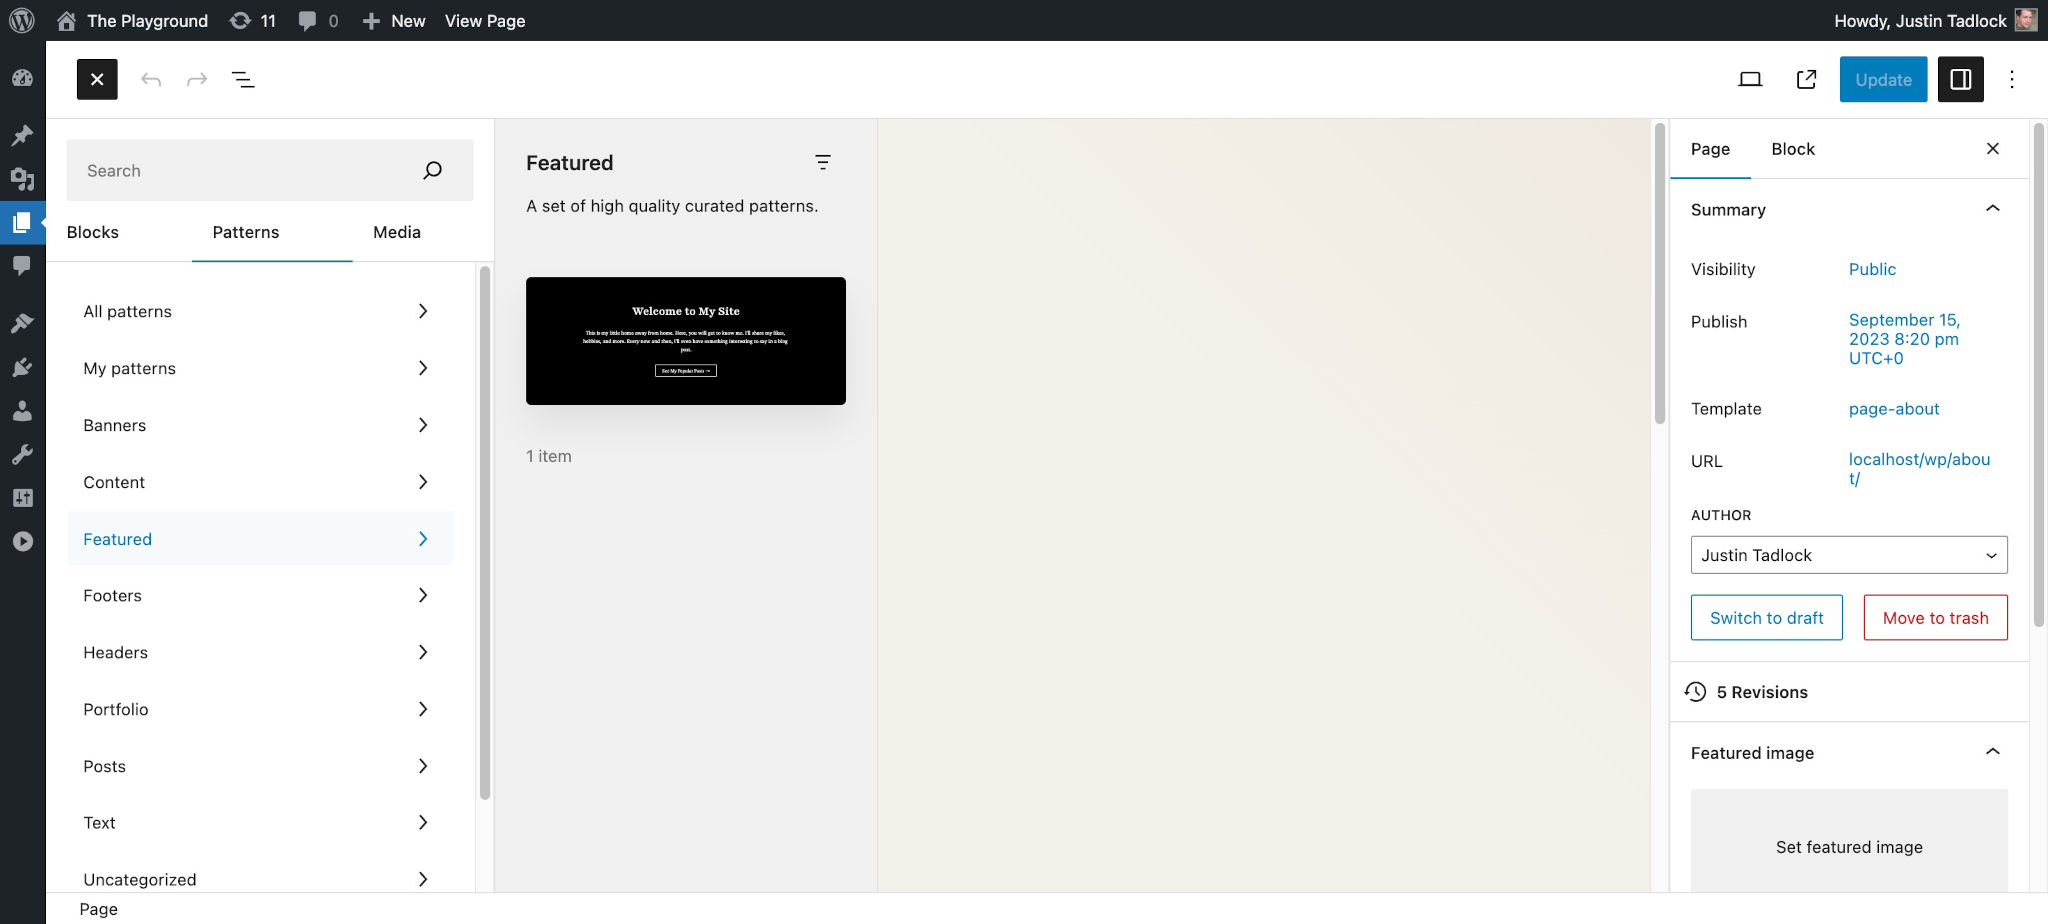
You should also be able to see your pattern listed under Appearance > Editor > Patterns in the WordPress admin.
Using PHP to register patterns
Instead of using the /patterns folder to auto-register your patterns, you may choose to manually register them via PHP. You can mix and match both registration methods, but an individual pattern must be registered with only one method.
To register block patterns with PHP, you must use the register_block_pattern() function. Here is what its signature looks like:
register_block_pattern(
	string $pattern_name,
	array $pattern_properties
): bool
The function accepts two parameters and returns true or false, depending on whether the pattern was successfully registered:
$pattern_name: A namespaced slug that is unique to your pattern in the form ofnamespace/pattern-name.$pattern_properties:content: The block markup for the pattern.title: A human-readable title that can be translated.slug: A namespaced slug that is unique to your pattern in the form ofnamespace/pattern-name.categories: An array of categories in which the pattern belongs.description: The long description of the registered pattern. Only shown to screen readers.viewportWidth: The width of the<iframe>viewport when previewing the pattern (in pixels).inserter: Whether to show the pattern in the inserter. Defaults totrue.keywords: An array of keywords related to the pattern for search.blockTypes: An array of block types to associate the pattern with.postTypes: An array of post types in which to limit the pattern. Defaults to all post types.source: The source for the registered pattern. This should be set tothemesince the pattern is coming from a theme.templateTypes: An array of template types the pattern fits with.
When registering patterns via PHP, you should do so on the init hook. Now try registering your custom pattern by adding this code in functions.php (be sure to add your custom markup to the content property):
add_action( 'init', 'themeslug_register_patterns' );

function themeslug_register_patterns() {
	register_block_pattern( 'themeslug/hero', array(
		'title'      => __( 'Hero', 'themeslug' ),
		'categories' => array( 'featured' ),
		'source'     => 'theme',
		'content'    => '<!-- Block pattern goes here. -->'
	) );
}
Including patterns in templates
When building themes, patterns are not merely reusable sections of blocks that users can add to their content. That is a nice feature, but the true power of patterns is using them directly in your theme’s front-end output.
You can include patterns in your templates or template parts by adding the Pattern block markup and passing along the pattern slug.
Here is what the Pattern block markup would look like when calling your existing “hero” pattern:
<!-- wp:pattern {"slug":"themeslug/hero"} /-->That should be relatively straightforward. All you need to know is the slug value from when you registered the pattern.
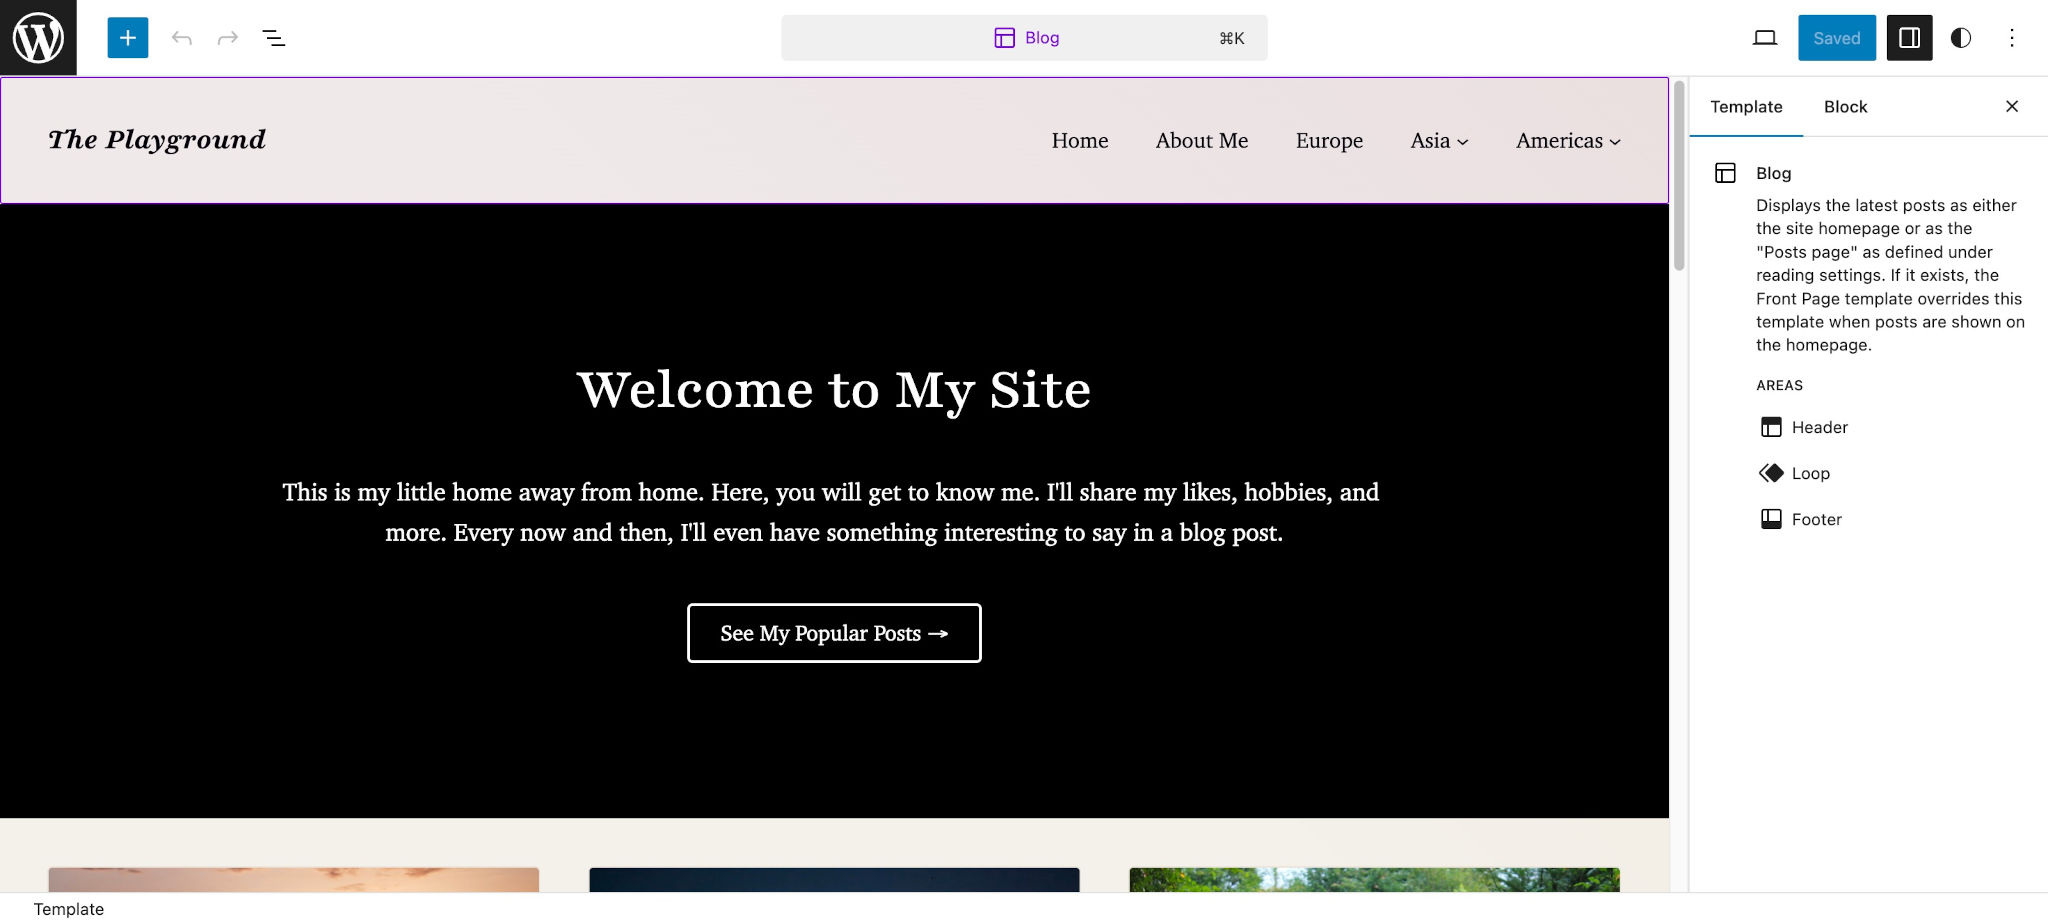
Now try adding it to one of your theme’s templates, such as /templates/home.html or /templates/index.html below the header. Your template with the pattern code should look similar to this:
<!-- wp:template-part {"slug":"header"} /-->

<!-- wp:pattern {"slug":"themeslug/hero"} /-->

<!-- Some other blocks. /-->

<!-- wp:template-part {"slug":"footer"} /-->
Now test the addition of the pattern in the Site Editor by going to Appearance > Editor > Templates and choosing the template you added it to:
Unregistering block patterns
There are times when you need to unregister block patterns so that they do not appear in the inserter for users. For example, you may want to remove some of the core WordPress patterns, those added by a parent theme (if you’re building a child theme), or those added by third-party plugins.
When you need to unregister a single block pattern, you’ll use the unregister_block_pattern() function:
unregister_block_pattern( string $pattern_name ): boolLike when registering patterns, you’ll also want to unregister on the init hook. Because patterns are generally (but not always) registered with the default priority 10 on init, you’ll want to use a higher priority so that your code runs later.
Try unregistering your custom pattern from earlier by adding this code to your functions.php file:
add_action( 'init', 'themeslug_unregister_patterns', 999 );

function themeslug_unregister_patterns() {
	unregister_block_pattern( 'themeslug/hero' );
}
Removing core patterns
While you can use unregister_block_pattern() to unregister individual core WordPress patterns, you can also choose to get rid of all of them by removing support for the core-block-patterns feature.
To remove all core WordPress patterns, add this code to your theme’s functions.php file:
add_action( 'after_setup_theme', 'themeslug_remove_core_patterns' );

function themeslug_remove_core_patterns() {
	remove_theme_support( 'core-block-patterns' );
}
Disabling remote patterns
WordPress also automatically loads some patterns remotely from the official Pattern Directory on WordPress.org. There are some situations where you might not want to load these patterns, such as when they don’t match your theme design. You may also want to opt out of calling a remote API on a site that you’re building for a client. Whatever the case, you can disable this by filtering the should_load_remote_block_patterns hook.
To disable remote patterns, add this code to your functions.php file:
add_filter( 'should_load_remote_block_patterns', '__return_false' );Tips and tricks
Below, you’ll find various tips, tricks, and other useful features that make block patterns a powerful and flexible part of WordPress theme development.
Internationalizing text in patterns
One of the primary use cases for block patterns is internationalizing text (making it ready for translation). For example, if you have text in a template or template part, the only way to internationalize that text is to move it into a pattern, where you have full access to PHP.
Because pattern files are just PHP, you can use any of the internationalization functions within WordPress. In the below example, you’ll use esc_html_e() to both escape the text for security and make it ready for translators.
Try taking your “hero” pattern example and wrapping the custom text inside the Heading, Paragraph, and Button blocks with the esc_html_e() function. Your pattern file should look like this:
<?php
/**
* Title: Hero
* Slug: themeslug/hero
* Categories: featured
*/
?>
<!-- wp:cover {"overlayColor":"contrast","align":"full"} -->
<div class="wp-block-cover alignfull"><span aria-hidden="true" class="wp-block-cover__background has-contrast-background-color has-background-dim-100 has-background-dim"></span><div class="wp-block-cover__inner-container"><!-- wp:group {"style":{"spacing":{"blockGap":"2.5rem"}},"layout":{"type":"constrained","wideSize":"%","contentSize":"75%"}} -->
<div class="wp-block-group"><!-- wp:heading {"textAlign":"center"} -->
<h2 class="wp-block-heading has-text-align-center"><?php esc_html_e( 'Welcome to My Site', 'themeslug' ) ?></h2>
<!-- /wp:heading -->
<!-- wp:paragraph {"align":"center"} -->
<p class="has-text-align-center"><?php esc_html_e( "This is my little home away from home. Here, you will get to know me. I'll share my likes, hobbies, and more. Every now and then, I'll even have something interesting to say in a blog post.", 'themeslug' ) ?></p>
<!-- /wp:paragraph -->
<!-- wp:buttons {"layout":{"type":"flex","justifyContent":"center"}} -->
<div class="wp-block-buttons"><!-- wp:button {"className":"is-style-outline"} -->
<div class="wp-block-button is-style-outline"><a class="wp-block-button__link wp-element-button"><?php esc_html_e( 'See My Popular Posts ', 'themeslug' ) ?></a></div>
<!-- /wp:button --></div>
<!-- /wp:buttons --></div>
<!-- /wp:group --></div></div>
<!-- /wp:cover -->Using images and other assets
Adding dynamic URLs for images and other assets is another important feature of patterns. Because you have PHP access, you can use functions like get_theme_file_uri() to output an image URL that’s bundled with your theme, for example.
Try adding an image background to your “hero” pattern’s Cover block. If you need an image, try grabbing one from the WordPress Photo Directory (the example below uses this Nepal night scene photo).
Download an image and save it to your theme’s /assets/images folder (or a folder of your choice) and name it hero-background.jpg.
Then open your pattern in the editor and upload the image as the background for the Cover block, which should look like this:
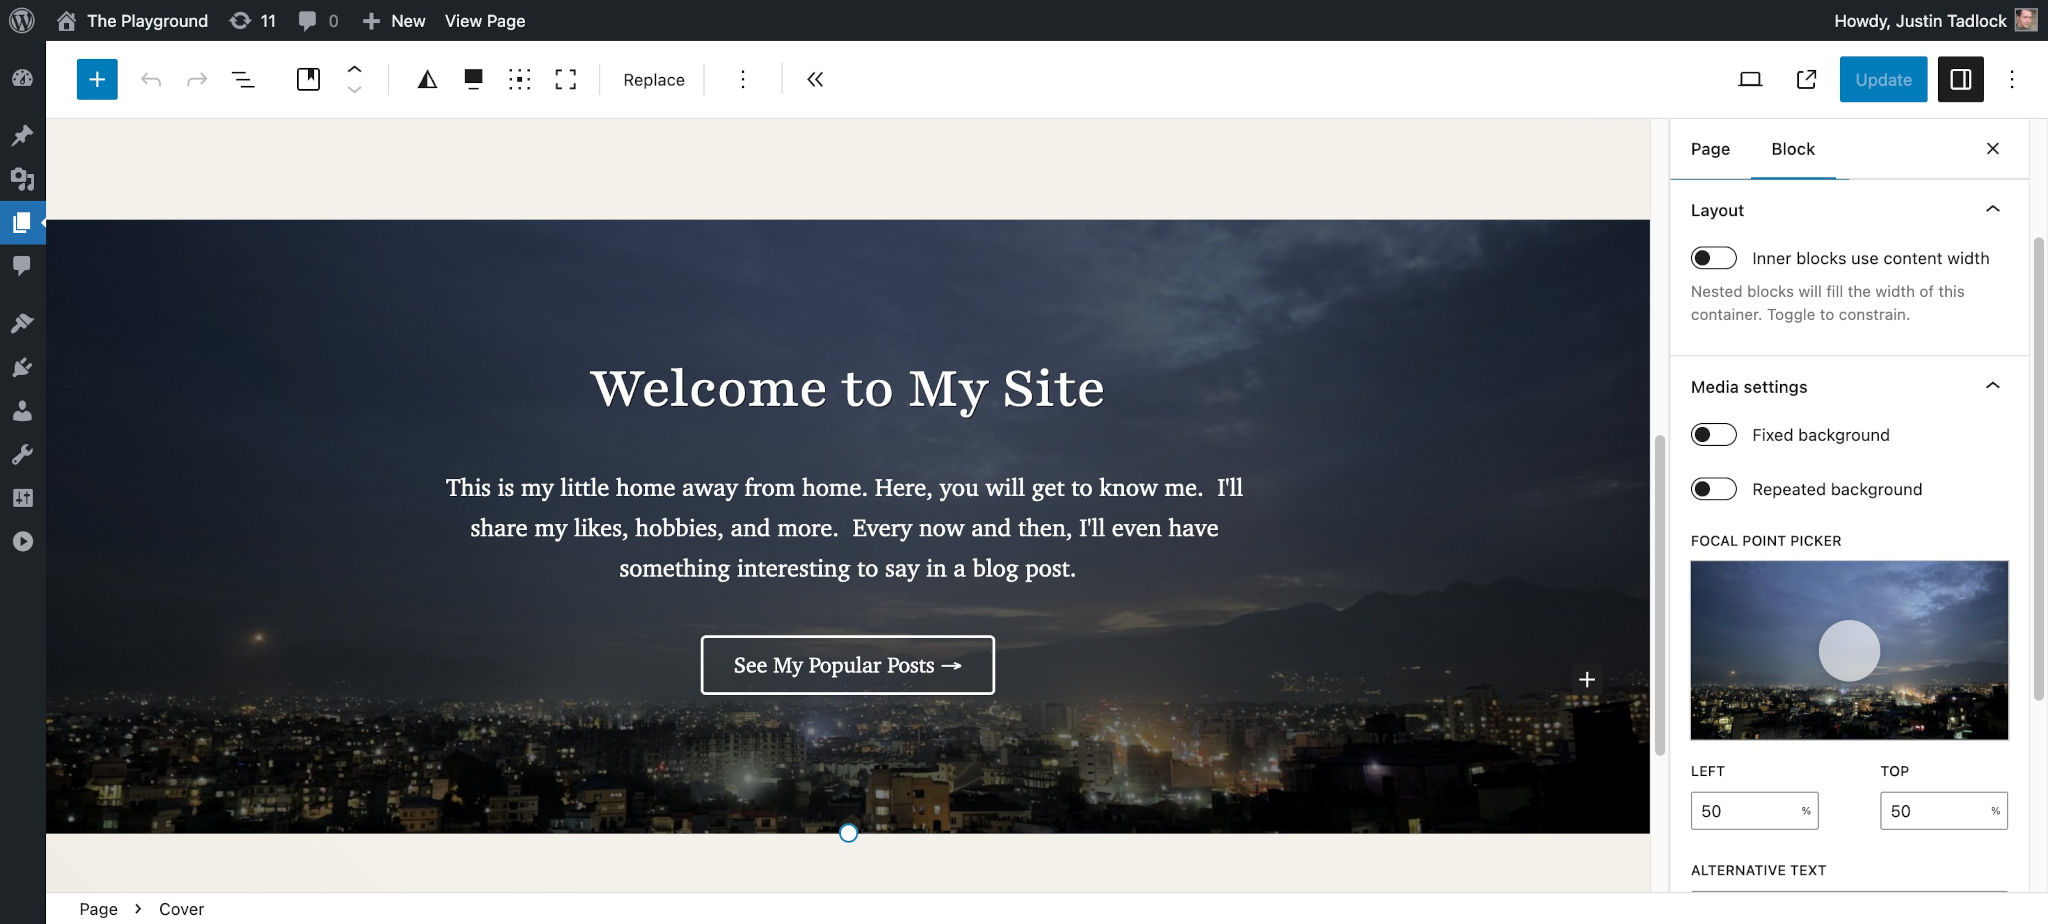
As you did earlier, copy the blocks that make up the pattern. You’ll notice that you have two instances of the image URL in your pattern code. It will be a hardcoded URL similar to this:
http://localhost/wp/wp-content/uploads/2023/10/hero-background.jpgYou need to change both of those instances so that they point to the image that is located in your theme’s /assets/images folder. For this, you need do two things:
- Get the correct URL using a function like
get_theme_file_uri(). - Escape the URL so that it’s safe for output with
esc_url().
Change the hard coded image URLs to this:
<?php echo esc_url( get_theme_file_uri( 'assets/images/hero-background.jpg' ) ) ?>Your final pattern code should look like this (note that this example includes internationalized text as explained in the previous section):
<?php
/**
* Title: Hero
* Slug: themeslug/hero
* Categories: featured
*/
?>
<!-- wp:cover {"url":"<?php echo esc_url( get_theme_file_uri( 'assets/images/hero-background.jpg' ) ) ?>","id":3838,"dimRatio":50,"overlayColor":"contrast","align":"full"} -->
<div class="wp-block-cover alignfull"><span aria-hidden="true" class="wp-block-cover__background has-contrast-background-color has-background-dim"></span><img class="wp-block-cover__image-background wp-image-3838" alt="" src="<?php echo esc_url( get_theme_file_uri( 'assets/images/hero-background.jpg' ) ) ?>" data-object-fit="cover"/><div class="wp-block-cover__inner-container"><!-- wp:group {"style":{"spacing":{"blockGap":"2.5rem"}},"layout":{"type":"constrained","wideSize":"%","contentSize":"75%"}} -->
<div class="wp-block-group"><!-- wp:heading {"textAlign":"center"} -->
<h2 class="wp-block-heading has-text-align-center"><?php esc_html_e( 'Welcome to My Site', 'themeslug' ) ?></h2>
<!-- /wp:heading -->
<!-- wp:paragraph {"align":"center"} -->
<p class="has-text-align-center"><?php esc_html_e( "This is my little home away from home. Here, you will get to know me. I'll share my likes, hobbies, and more. Every now and then, I'll even have something interesting to say in a blog post.", 'themeslug' ) ?></p>
<!-- /wp:paragraph -->
<!-- wp:buttons {"layout":{"type":"flex","justifyContent":"center"}} -->
<div class="wp-block-buttons"><!-- wp:button {"className":"is-style-outline"} -->
<div class="wp-block-button is-style-outline"><a class="wp-block-button__link wp-element-button"><?php esc_html_e( 'See My Popular Posts ', 'themeslug' ) ?></a></div>
<!-- /wp:button --></div>
<!-- /wp:buttons --></div>
<!-- /wp:group --></div></div>
<!-- /wp:cover -->Conditionally loading third-party blocks
There are times when you might want to only use a block if it is registered on the user’s install. This is particularly true for third-party blocks that may be contained in a plugin.
It’s important to note that WordPress will prompt a user to install the block if you add its block markup and it’s not installed. It won’t result in a broken website, so it’s OK to avoid using the method described in this section.
But if you would prefer to hide an unregistered block (or use an alternative), you can conditionally check if a block is registered via the WP_Block_Type_Registry::is_registered() method.
This example code shows how to check for the core/paragraph block. If it’s registered, it will output the block markup:
<?php if ( WP_Block_Type_Registry::get_instance()->is_registered( 'core/paragraph' ) ) : ?>
	<!-- Add your block markup here. -->
<?php endif ?>
Try applying this method to your registered “hero” block from earlier by wrapping the Paragraph block in this conditional check. Here’s what your pattern code should look like:
<?php
/**
* Title: Hero
* Slug: themeslug/hero
* Categories: featured
*/
?>
<!-- wp:cover {"url":"<?php echo esc_url( get_theme_file_uri( 'assets/images/hero-background.jpg' ) ) ?>","id":3838,"dimRatio":50,"overlayColor":"contrast","align":"full"} -->
<div class="wp-block-cover alignfull"><span aria-hidden="true" class="wp-block-cover__background has-contrast-background-color has-background-dim"></span><img class="wp-block-cover__image-background wp-image-3838" alt="" src="<?php echo esc_url( get_theme_file_uri( 'assets/images/hero-background.jpg' ) ) ?>" data-object-fit="cover"/><div class="wp-block-cover__inner-container"><!-- wp:group {"style":{"spacing":{"blockGap":"2.5rem"}},"layout":{"type":"constrained","wideSize":"%","contentSize":"75%"}} -->
<div class="wp-block-group"><!-- wp:heading {"textAlign":"center"} -->
<h2 class="wp-block-heading has-text-align-center"><?php esc_html_e( 'Welcome to My Site', 'themeslug' ) ?></h2>
<!-- /wp:heading -->
<?php if ( WP_Block_Type_Registry::get_instance()->is_registered( 'core/paragraph' ) ) : ?>
<!-- wp:paragraph {"align":"center"} -->
<p class="has-text-align-center"><?php esc_html_e( "This is my little home away from home. Here, you will get to know me. I'll share my likes, hobbies, and more. Every now and then, I'll even have something interesting to say in a blog post.", 'themeslug' ) ?></p>
<!-- /wp:paragraph -->
<?php endif ?>
<!-- wp:buttons {"layout":{"type":"flex","justifyContent":"center"}} -->
<div class="wp-block-buttons"><!-- wp:button {"className":"is-style-outline"} -->
<div class="wp-block-button is-style-outline"><a class="wp-block-button__link wp-element-button"><?php esc_html_e( 'See My Popular Posts ', 'themeslug' ) ?></a></div>
<!-- /wp:button --></div>
<!-- /wp:buttons --></div>
<!-- /wp:group --></div></div>
<!-- /wp:cover -->Of course, since the Paragraph block is registered by core WordPress and assuming it hasn’t been unregistered, your Paragraph block should appear in the editor and on the front end. The primary use case for this is to conditionally check third-party blocks.
Conditionally registering patterns
If you need to conditionally register an entire pattern instead of simply conditionally outputting specific parts of it (shown in the previous section), there are two methods to choose from, depending on how you prefer to register patterns.
Conditionally registering patterns in the /patterns folder
If you have used the auto-registration method of placing your pattern in your theme’s /patterns folder, there is no true way to conditionally register it. What you must do in this case is unregister the pattern.
Suppose that you wanted to only make the hero pattern you registered earlier available if the core/paragraph block is registered. In a real-world scenario, you’d likely be checking for a third-party block, and the core/paragraph block is used only for the sake of this example.
Try this code inside of your functions.php file to unregister your previously-registered pattern:
add_action( 'init', 'themeslug_unregister_patterns', 999 );

function themeslug_unregister_patterns() {
	if ( WP_Block_Type_Registry::get_instance()->is_registered( 'core/paragraph' ) ) {
		unregister_block_pattern( 'themeslug/hero' );
	}
}
Conditionally registering patterns via register_block_pattern()
If you manually registered your patterns via PHP, you only need to wrap your call to register_block_pattern() with your conditional check.
Using the same example as above, try only registering your pattern if the core/paragraph block is registered by adding this to functions.php:
add_action( 'init', 'themeslug_register_patterns', 999 );

function themeslug_register_patterns() {
	if ( WP_Block_Type_Registry::get_instance()->is_registered( 'core/paragraph' ) ) {
		register_block_pattern( 'themeslug/hero', array(
			'title'      => __( 'Hero', 'themeslug' ),
			'categories' => array( 'featured' ),
			'source'     => 'theme',
			'content'    => '<!-- Block pattern goes here. -->'
		) );
	}
}
Pattern categories
WordPress has several block pattern categories that it registers by default:
featuredaboutaudio(added in WordPress 6.4)bannerbuttonscall-to-actioncolumnscontactfootergalleryheadermediaportfoliopostsquery(usepostsinstead)servicesteamtestimonialstextvideo(added in WordPress 6.4)
It’s generally best to use these default categories for your theme. This keeps a consistent UI that users will be accustomed to. But there are times when you may want to add your own categories or even remove those that are already registered.
In this section of the article, you’ll learn how to both register and unregister custom block pattern categories.
Registering a pattern category
To register a custom category for putting one or more of your patterns into, you must use the register_block_pattern_category() function:
register_block_pattern_category(
	string $category_name,
	array $category_properties
): bool
The function accepts two parameters:
$category_name: A unique ID/slug for the category. It’s good practice to prefix this with your theme slug.$category_properties: An array of properties for defining further data about the category:label: A human-readable label/title for the category that may be translated.description: A description for the category that may be translated.
Try adding a new custom pattern category for your theme. Add this code to your theme’s functions.php file:
add_action( 'init', 'themeslug_register_pattern_categories' );
function themeslug_register_pattern_categories() {
register_block_pattern_category( 'themeslug/custom', array(
'label' => __( 'Theme Name: Custom', 'themeslug' ),
'description' => __( 'Custom patterns for Theme Name.', 'themeslug' )
) );
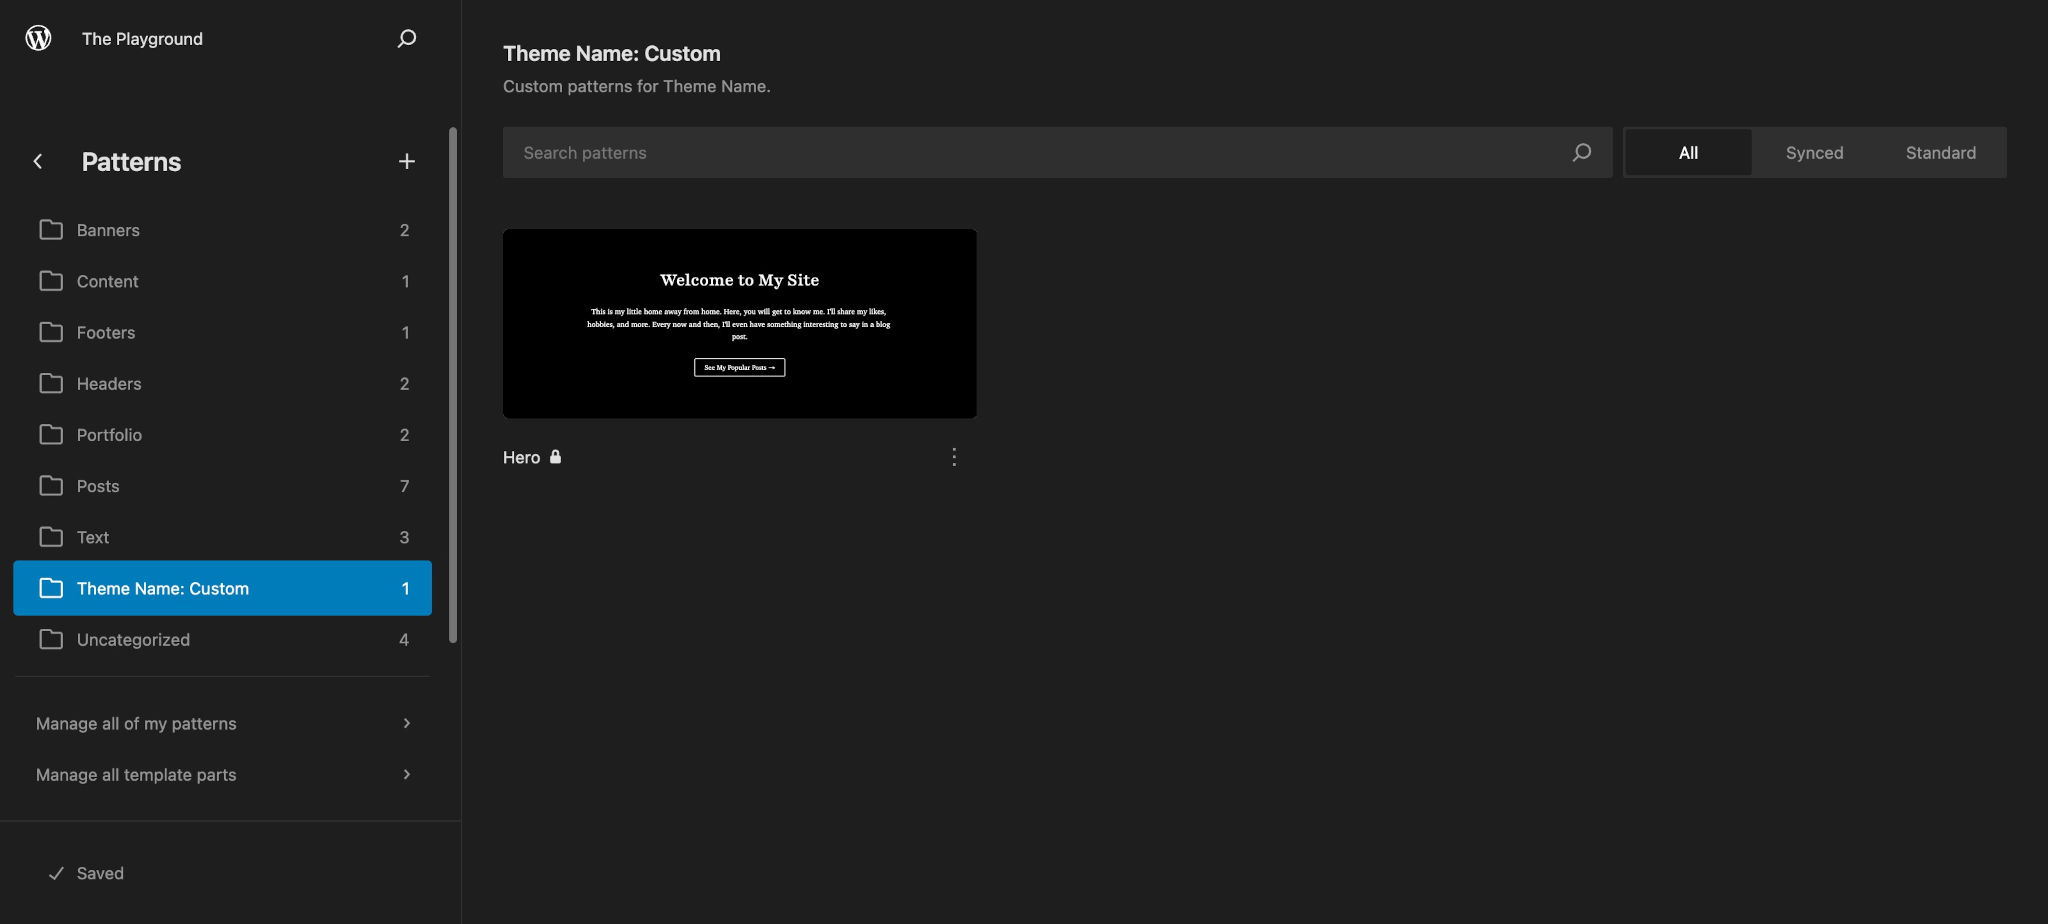
}Now try adding the themeslug/custom category to any block pattern:
<?php
/**
 * Title: Hero
 * Slug: themeslug/hero
 * Categories: featured, themeslug/custom
 */
?>
<!-- Your block markup goes here. -->
Any registered patterns for this category will now appear in the inserter and under Appearance > Editor > Patterns:
Unregistering a pattern category
To unregister a registered pattern category, you must use the unregister_block_pattern_category() function:
unregister_block_pattern_category( string $category_name ): boolThe function accepts a single parameter:
$category_name: The name (i.e., slug) of the registered category to unregister.
Try adding this code to your functions.php to remove the themeslug/custom category you registered in the previous step:
add_action( 'init', 'themeslug_unregister_pattern_categories' );

function themeslug_unregister_pattern_categories() {
	unregister_block_pattern_category( 'themeslug/custom' );
}